In this article I will show you how to enable Custom Fields in Gutenberg.
Are you having trouble trying to figure out how to enable Custom Fields after the latest WordPress updated, the Gutenberg update. Don’t worry I will show you how to enable the Custom Fields meta box in the latest editor.
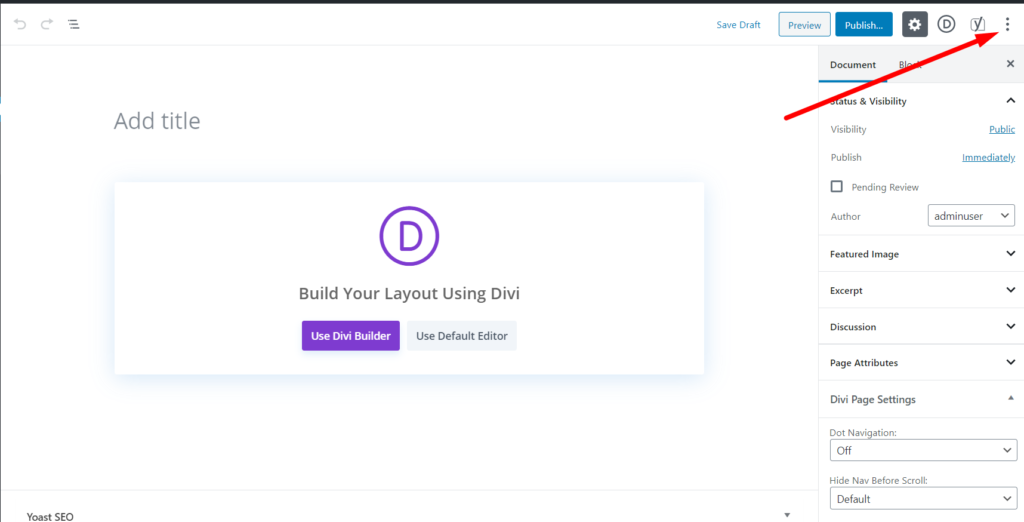
Press the Tools & Options Icon
Press the Tools and Options Icon at the top right of the Gutenberg Editor. This Icon looks like three vertically stacked dots or circles.

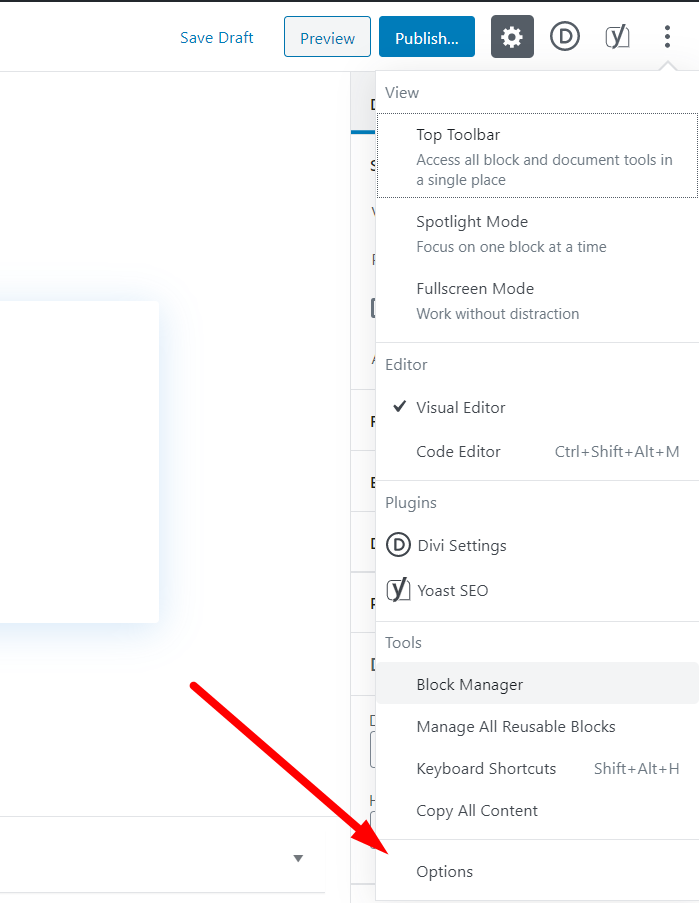
Choose Options
Pressing the Tools and Options icon will open a drop down menu. At the bottom of the drop down menu you will see the Options menu item. Press it!

Enable Custom Fields
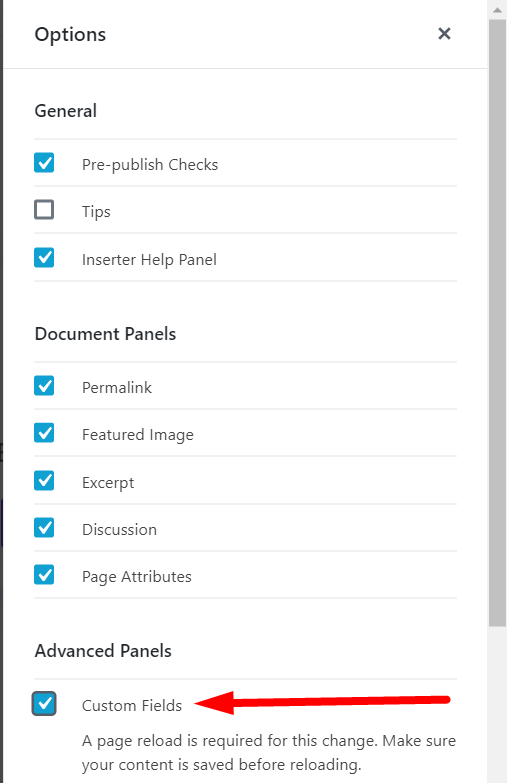
Clicking on Options menu item in the drop down will open a popup with a list of names of different Panels. You can enable or disable different panels you see in the list by using the checkbox next to their name.
A checked box next to name means the panel will appear and an unchecked box means the panel will be hidden.
The Custom Fields panel is unchecked by default.
To Enable Custom Fields you need to check the box next to Custom Fields. You can find Custom Fields under the Advanced Panels as seen in the screenshot below.

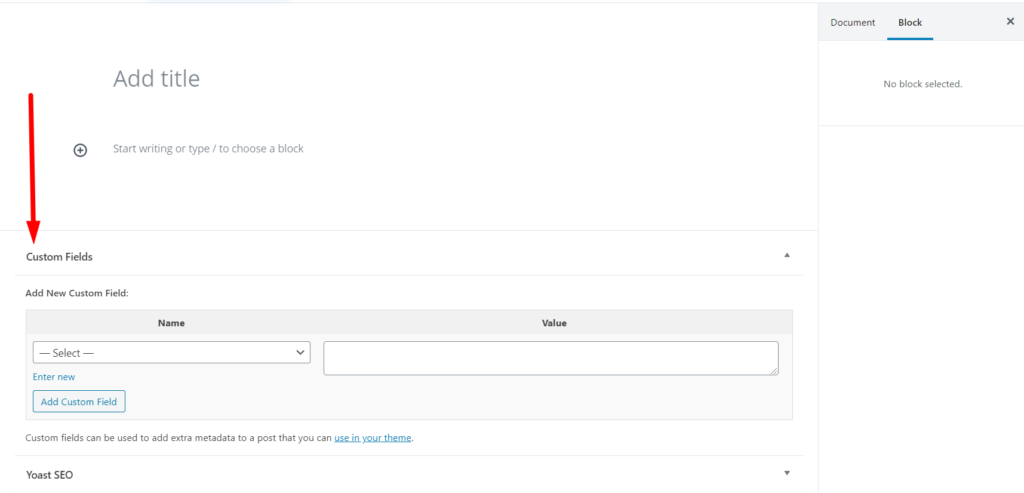
As soon as you check the box next to Custom Fields a message should appear under it prompting you to reload the page. Press the button to reload the page and scroll down. You should see the Custom Fields Panel visible under the Block Editor now.

Custom Fields in WordPress can be used to store additional information linked to a Post, Page or Custom Post Type. The data can be anything in the form of a key value pair. The official WordPress article on Custom Fields does a really good job at explaining how to use them them.
Leave a comment below if you found this helpful or have any questions. Don’t forget to subscribe to the Newsletter to receive the latest WordPress tutorials in your inbox.
0 Comments