In this tutorial we are going to learn how to create a slider with static text and image on it while the background image changes for each slide.
Here is a preview of how it will look at the end.

Now lets get started with the tutorial.
1. Create Your Slider
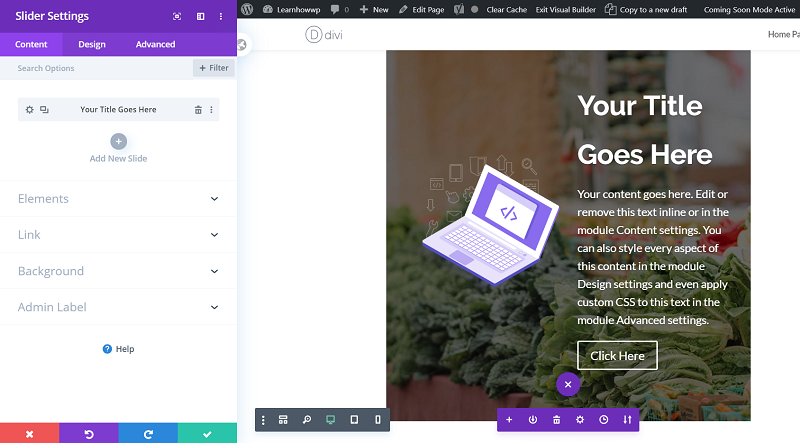
The first thing you need to do is create your slider and the first slide inside the slider with text, description and image that you want to show on top of all the slides.
For this tutorial I am going to be using the default title and description text in the slider with the laptop image from the LMS layout from the Divi layout library.

After adding your first slide in the slider duplicate it any number of times. After duplicating the slides change the background image inside each slide without making any changes to the Text or Image on the top inside each slide.
2. Add Custom CSS Class to Slider
Now that we have the slider setup we need to add a CSS Class to Slider to make sure that the CSS code that we use only affects this slider and does not affect any other sliders that are present on the website or are added in the future.
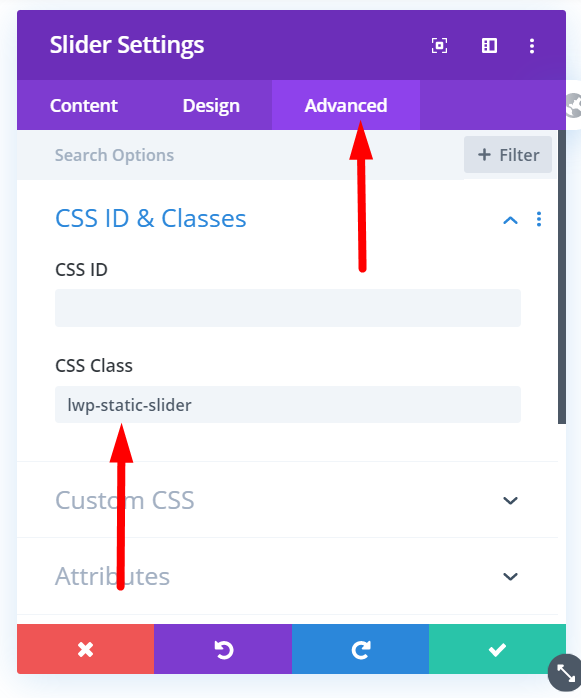
Open the Slider Settings > Advanced > CSS ID & Classes > CSS Class and enter lwp-static-slider

3. Add Custom CSS Code to the Theme Options
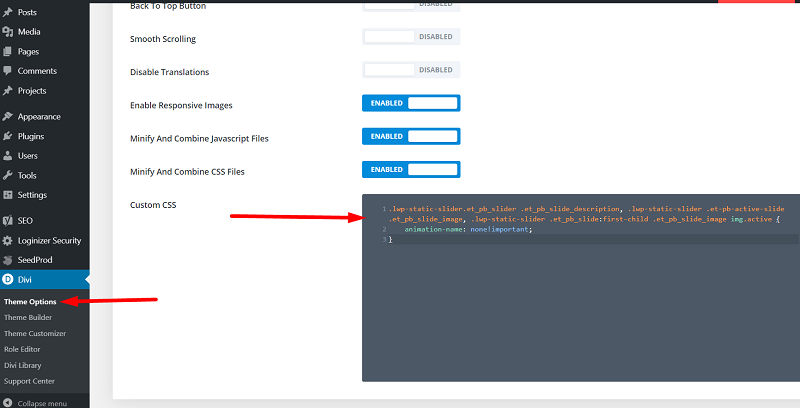
Next all you need to do is add the Custom CSS code below to your WordPress Dashboad > Divi > Theme Options > General > Custom CSS
.lwp-static-slider.et_pb_slider .et_pb_slide_description, .lwp-static-slider .et-pb-active-slide .et_pb_slide_image, .lwp-static-slider .et_pb_slide:first-child .et_pb_slide_image img.active {
    animation-name: none!important;
}

Now save the Theme Options and your page where you have the slider and check it on the front end. The text and image on top of each slide should be static now just like the preview.
If you only want to make the description in the slider static and show a different image on each slide then you can remove the code that we entered above and use the following code instead. The code below will only remove the animation from the text inside the slider while keeping the animation on the image in each slide.
.lwp-static-slider.et_pb_slider .et_pb_slide_description{
    animation-name: none!important
}
If you only want to only make image static and show a different and animated description on each slide then you can use the code below. Add it to your Custom CSS in the Theme Options.
.lwp-static-slider .et-pb-active-slide .et_pb_slide_image, .lwp-static-slider .et_pb_slide:first-child .et_pb_slide_image img.active {
    animation-name: none!important;
}
Leave a comment below if you found this helpful or have any questions. Don’t forget to subscribe to the Newsletter to receive the latest tutorials in your inbox.
Stuck on the slider… I wish the image would stay actual size, instead of stretching to fill the space (the background is fine, I mean the extra image, that slides in with the text).
I’m using a book cover and it can’t stretch, how do I stop it?
https://urbanepics.com/blog/
This worked great thank you, I tried a couple of other tutorials trying to do the same thing but with no luck. Well done!