In this article I will share the steps to add a History Back Button or a Browser Back Button in Divi theme.
We will add a Divi Button module and then with the a little bit of custom code we will make it function like the back button in the browser. Pressing the button will take you to the page that you were on before you visited the current page.
For example if you came to the page from Google search results then pressing the back button will take you back to the search results page, the last page in your web browsers history.
Add CSS Class to Button Module
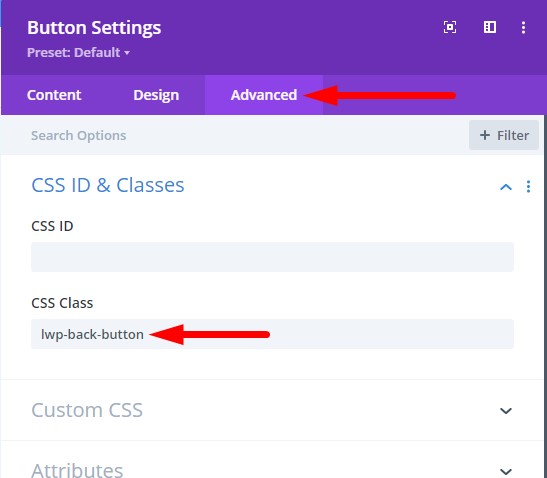
The first step is to add the CSS Class to the button module. Open the Module Settings > Advanced > CSS Class and add the class lwp-back-button
If you are not sure where to add the CSS class then please check the screenshot below.

We add a CSS class so that our code does not affect all the buttons on the website and only affects the specific button which has the custom class.
Add jQuery Code for Button to Open Previous Page in Browser History
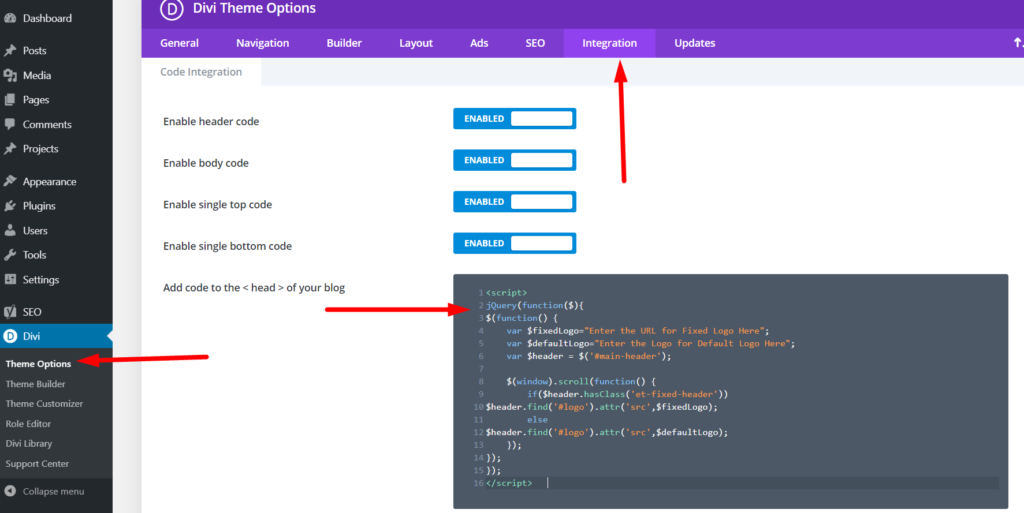
Next go to your WordPress Dashboard > Divi >Theme Options > Integration and then add the following code.
<script>
window.addEventListener('DOMContentLoaded', (event)=>{
    var elList = document.querySelectorAll('.lwp-back-button');
    elList.forEach(function(element) {
        element.addEventListener("click", function(event) {
            event.preventDefault();
            window.history.back();
        });
    });
}
);
</script>
Here is a screenshot of where to add the code in Divi theme options.

That’s it, the button will act like a browser back button. Pressing the button will take you to the last page in your browser history.
Here are some popular tutorials from the blog that you can read next.
- How To Change Number of Columns in Divi Mega Menu
- How To Add Buttons Side By Side In Divi Theme
- Remove Download Option from Video in Divi Video Module
Leave a comment below if you have any questions. Don’t forget to subscribe to the Newsletter to receive the latest tutorials in your inbox.
0 Comments