The documentation was last updated with the release of plugin version 1.2.3
- Installation and Setup:
- Contact Form DB Divi Menu Item
- Viewing Form Submissions
- Form Submissions Page
- Form Submission Details
- Additional Details
- Export Form Submissions
- Find Contact Form Unique ID
Installation and Setup:
How to add, configure, and customize the Divi Contact Form DB Plugin
Getting started with the Contact Form DB plugin is fairly simple. All you need to do is install the plugin on your website.
You do not need to configure the plugin or the contact form module after installation. The plugin will detect Contact Form Submissions and save them in your WordPress Database.
If a contact form has 3 fields, then 3 fields are stored by the plugin. If a contact form has 5 fields, then all 5 fields are stored by the plugin. The plugin will detect the fields on the form and store them when a form is submitted.
Note: If you are using the pro version and it was bought from our website, you will need to enter your license key and activate it before you can access all features of the plugin. If it was bought from the Divi Marketplace, you will not need to enter your license key as in that case your license is linked to your Divi account.
Contact Form DB Divi Menu Item:
After the plugin is installed a new menu item is added in the WordPress Dashboard.
Viewing Form Submissions:
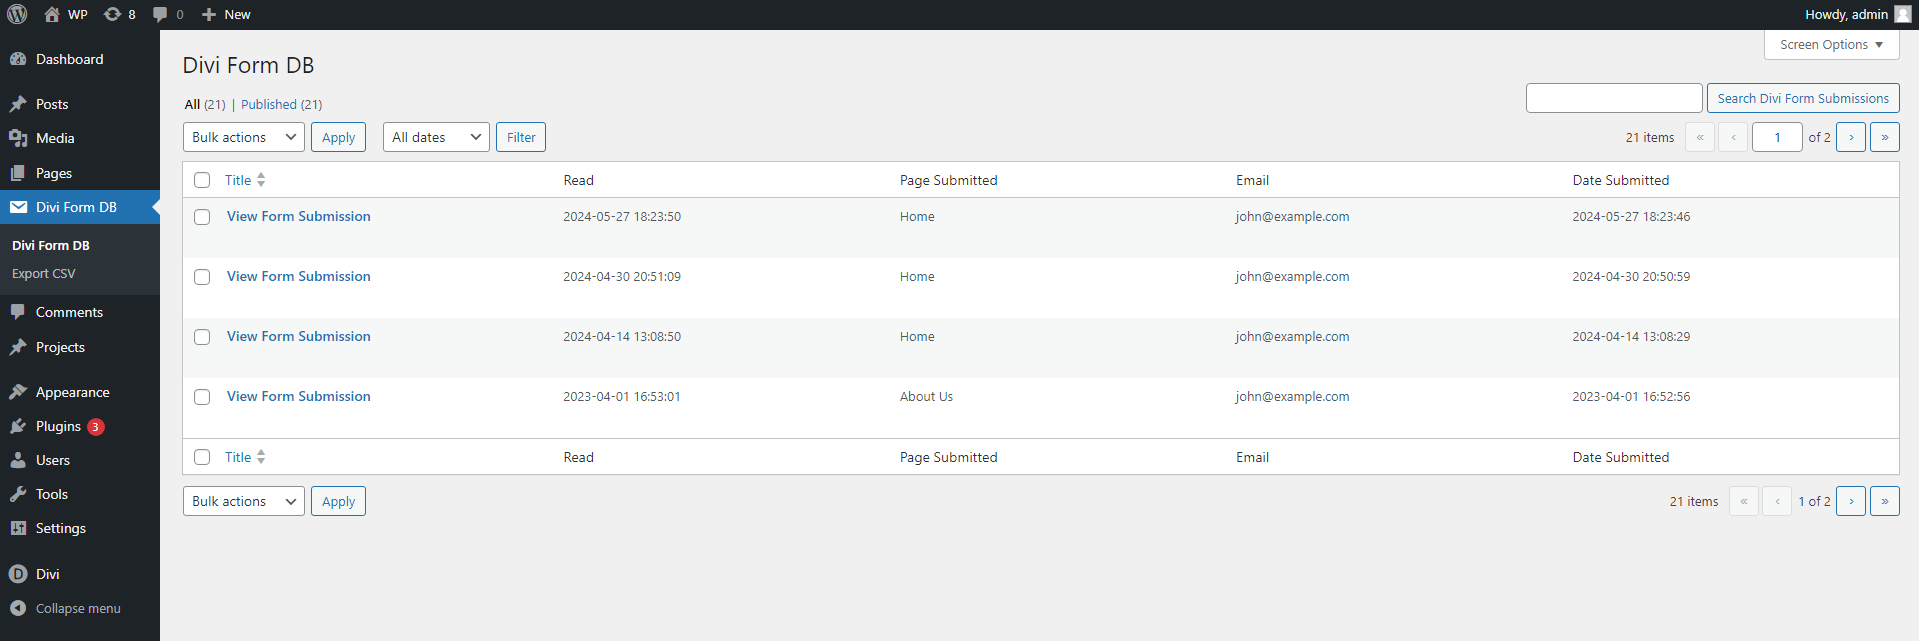
Click on the “Divi Form DB” menu item to view the main page of the plugin.
The page displays all form submissions in five columns.
- The first column has a link that will open the full details of the form submission.
- The second column displays the date the form submission was viewed.
- The third column displays the page where the form was submitted.
- The fourth column displays the email address submitted through the form.
- The last column displays the date and time of the form submission.
You can click on the ‘View Form Submission’ link to open the full details for a specific form submission.
The free version of the plugin displays a limited number of columns on this page.
Form Submissions Page:
Each form submission page contains all the information about the specific form submission. There are two sections on the page.
The free version of the plugin only supports the “name,” “email,” and “message”. Not all submitted fields can be accessed in the free version.
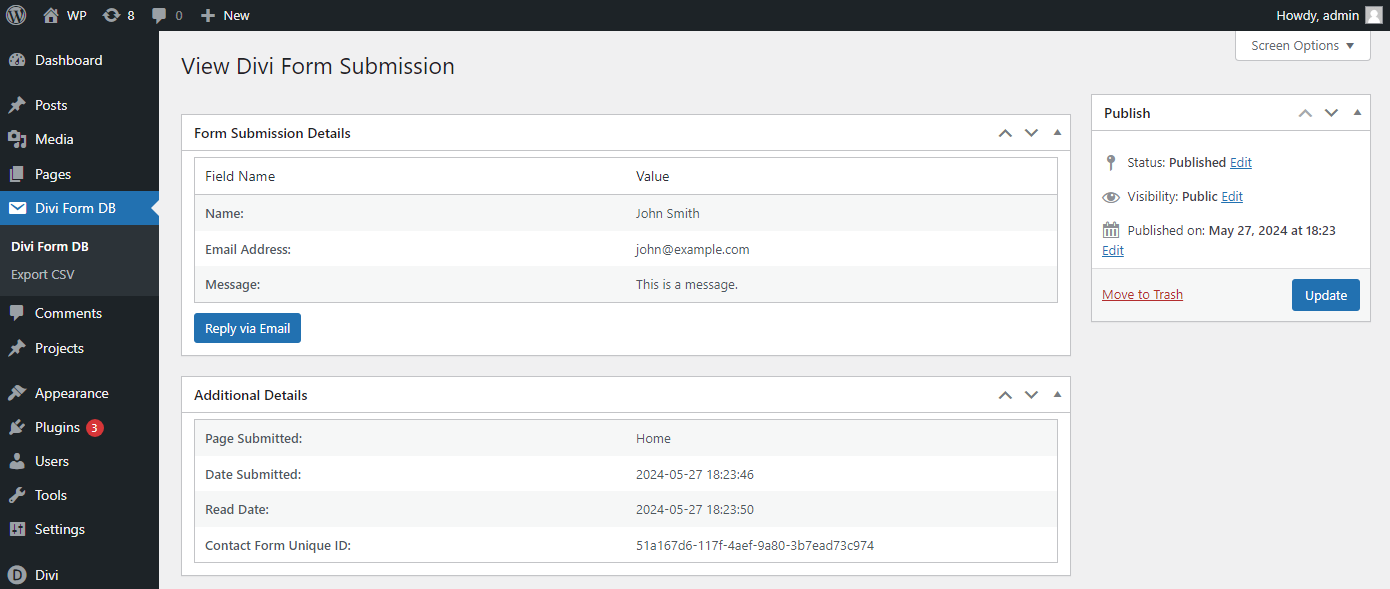
Form Submission Details:
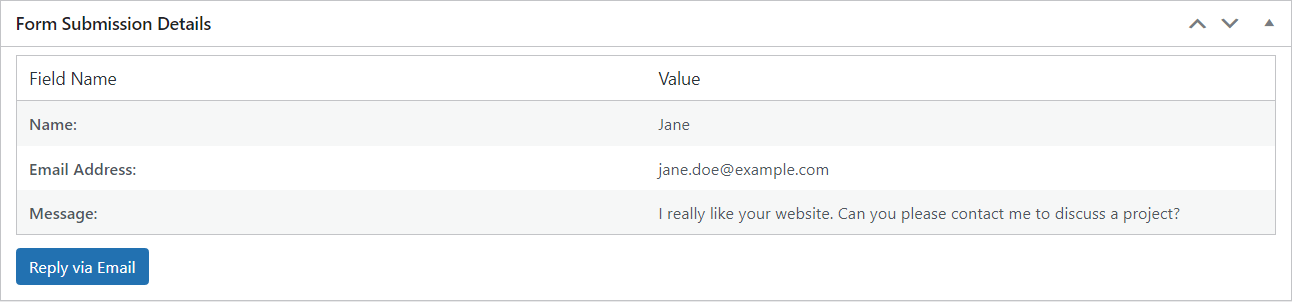
The “Form Submission Details” section displays the information submitted by the user on the form.
At the bottom of the “Form Submission Details” section, there is a “Reply via Email” button. Clicking on the button will open the default email client on your device.
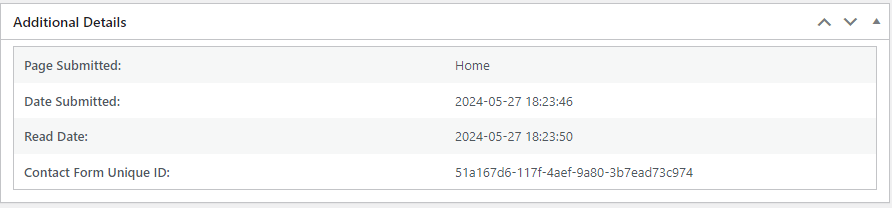
Additional Details:
The “Additional Details” section displays additional information related to the form submission.
- Page Submitted
- Date Submitted
- Read Date
- Contact Form Unique ID
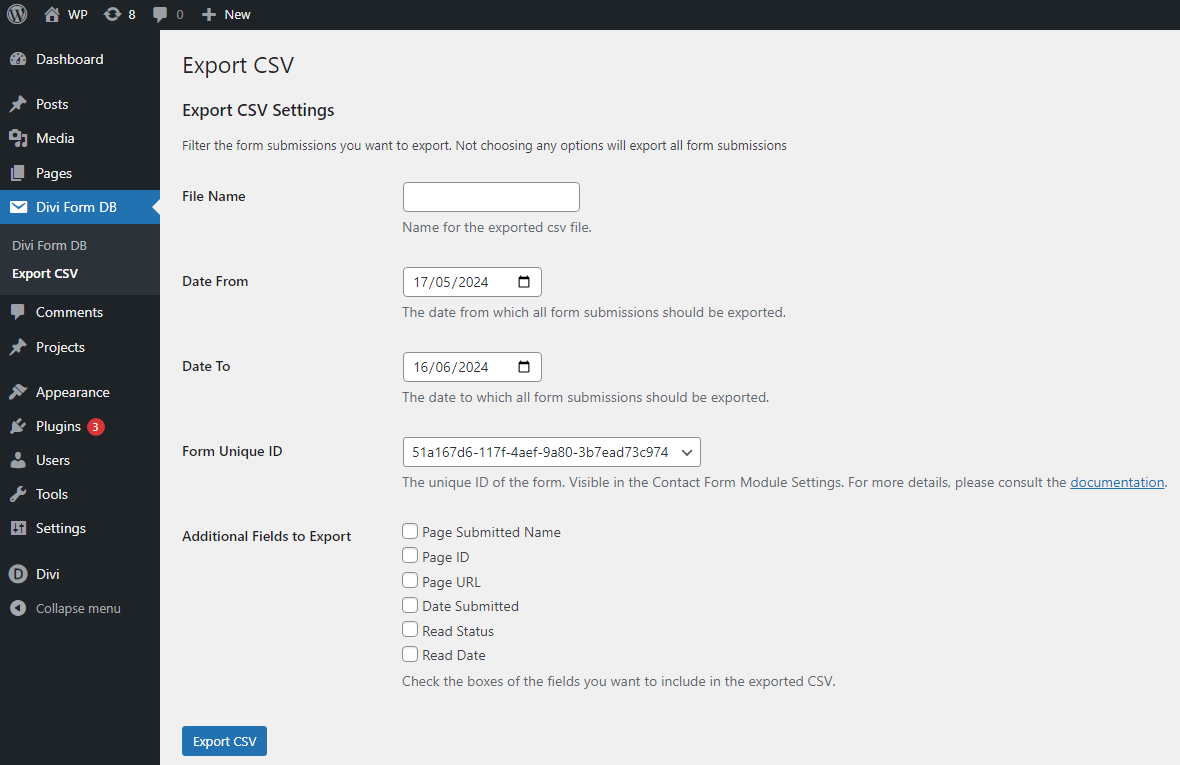
Export Form Submissions:
Click on the “Export CSV” menu item to view the Export page of the plugin.
The Export CSV Form has 4 options.
- File Name: Optional field for setting the name of the exported CSV file.
- Date From: The Date From which you want to export all form submissions.
- Date To: The Date To which you want to export all from submissions.
- Form Unique ID: The unique ID of the form for which the submissions need to be exported.
- Additional Fields to Export: The additional fields that you want to include in the exported CSV.
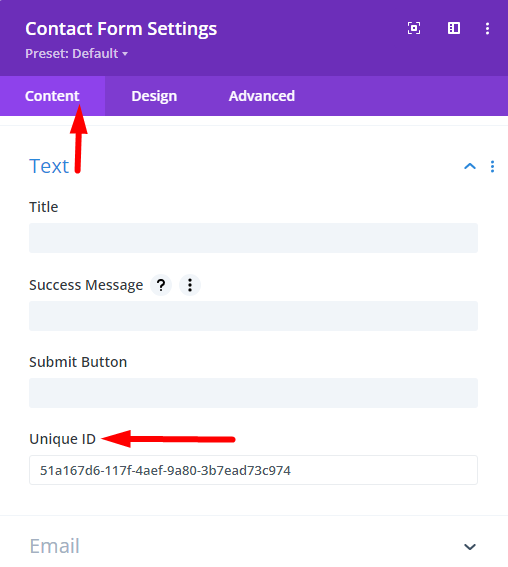
Find Contact Form Unique ID:
To find the Unique ID of any Contact Form:
- Open the Contact Form Module Settings.
- Go to the Content Tab > Text Toggle > Unique ID
The Unique ID is generated for each form by the Divi Theme. It is unique for each form on your website.